Quantcast
Channel: BizTalkGurus
Viewing all 2977 articles
Browse latest View live

BizTalk Server 2016 Feature Pack 3

$
0
0

In this blog post we will update you on which new capabilities came with BizTalk Server 2016 Feature Pack 3. Earlier, we have also written about Feature Pack 1 and 2. You can find these articles here:

Introduction to BizTalk Server 2016 Feature Packs

In 2017, Microsoft started releasing so-called Feature Packs for BizTalk Server 2016. The concept of releasing these Feature Packs is that Microsoft doesn’t want their BizTalk Server customers to wait for new features, until a new release of BizTalk Server arrives. Instead, they want their customers to enjoy these new features, as soon as possible once they have been developed and are ready to go to market. As these Feature Packs contain non-breaking features, there is little risk that a BizTalk customer runs into issues as a result of installing such Feature Packs. These Feature Packs are only available with the Enterprise and Developer edition of BizTalk Server 2016.

Since Microsoft started with this strategy, they have released 3 Feature Packs:

The BizTalk Server 2016 Feature Packs are cumulative. This means that once you installed, for example, Feature Pack 3, you can also enjoy the features which were brought in Feature Pack 1 and 2.

You might have also noticed, that each Feature Update also contains a Cumulative Update. It is also possible to install these Cumulative Updates without the new capabilities which are provided by the Feature Packs. To check the most recent releases of these Cumulative Updates, please check this web site:

What’s new with BizTalk Server 2016 Feature Pack 3

This Feature Pack brings improvements in below mentioned areas:

  • Compliance
    • Compliance with US government accessibility standard
    • Privacy – Compliance with FIPS and GDPR
    • SQL Server 2016 SP 2 – Deploy multiple databases per instance of an Availability Group
  • Adapters
    • Office365 Outlook Email – Send and Receive messages using Office365 e-mail
    • Office365 Outlook Calendar – Create appointments using Office365 schedules
    • Office365 Outlook Contact – Create Office365 contacts
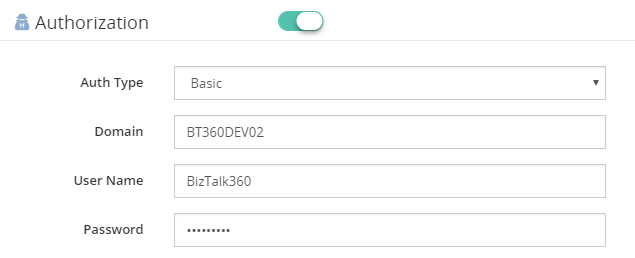
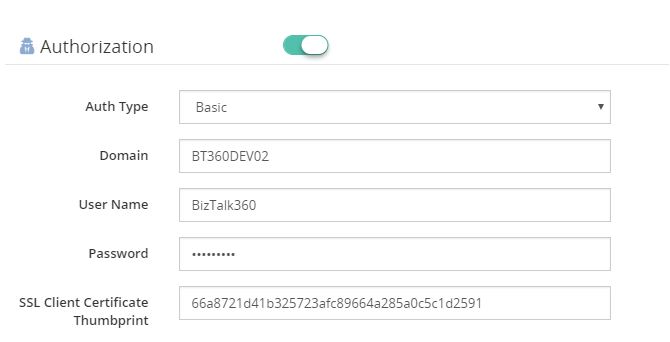
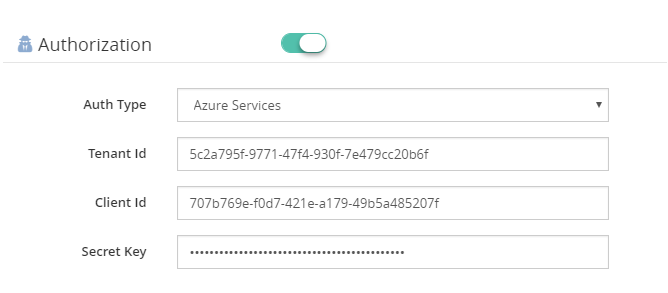
    • Web Authentication – Authenticate with Azure AD and OAuth using Microsoft Enterprise Single Sign-On
  • Administration
    • Advanced Scheduling – Set up recurrence on Receive Locations with greater precision

Compliance with FIPS and GDPR

As of this Feature pack, BizTalk Server is compatible with FIPS (Federal Information Processing Standard) and GDPR (General Data Protection Regulation).

FIPS is a standard developed by the US federal government for use in computer systems by non-military government and agencies. The specification comes with standards for among others:
  • Codes – country, region and state codes, weather conditions, emergency indications
  • Encryption – Data Encryption Standard, Advanced Encryption Standard

In case of BizTalk Server, this relates to how data becomes encrypted and decrypted in SQL Server. FIPS-compliance is enabled in the Operating System, under Local Policies; refer to the screenshot below. Once enabled, SQL Server will enter the FIPS compliant mode, thereby using cryptographic standards as defined in FIPS 140-2.

BizTalk Server 2016 Feature Pack 3: Local policies

GDPR is a European law on data protection which intends to regulate the privacy of individuals in the European Union. This new law supersedes Data Protection Directive 95/46/EC from 1995.

If you want to read more about BizTalk and GDPR, there are few resources written by Sandro Pereira on this topic:

Multiple databases in Availability Groups SQL instances

Also SQL Server 2016 SP 2 is supported from Feature Pack 3. This is especially good news when you are running SQL Server Availability Groups. Because this allows you to have multiple BizTalk databases in the same SQL instance. As this was not possible earlier, this made setting up BizTalk Server in Availability Groups complex and expensive. The reason for that, is because you needed to have multiple SQL Server instances than without Availability Groups and more expensive as you need to license each SQL Server instance in the Availability Groups.

New Adapters for Office365 connectivity

Few other interesting features of this Feature Pack are the adapters for Office365 Email, Calendar and Contacts. These adapters allow you to use Office365 accounts for receiving and transmitting emails, creating and updating calendar items and creating contacts.

The Office365 Email adapter

This adapter can be uses both for receiving as for transmitting messages. In BizTalk terms, you can use this adapter both on Receive Locations as on Send Ports.

On the receive side the adapter enables you to:

  • Select a folder from which to retrieve email

  • Select a timestamp from which you want to receive emails

  • Retrieve unread emails only

  • Select an action after the email has been read, like marking the email as read or deleting the email

When transmitting emails via a Send Port, you can set the following properties:

  • To – separate email addresses with a semicolon (‘;’), maximum 256 characters

  • CC – separate email addresses with a semicolon (‘;’), maximum 256 characters

  • Subject – enter maximum 256 characters

  • Importance – select Low, Normal or High from the drop down  in the Send Port

Also, it is important to realize that you can only send plain text messages.

Once you receive an email on a Receive Location, the Receive pipeline adds promoted properties, which you can use for routing the emails. These promoted properties are:

  • Importance

  • Subject

  • SenderName

  • SenderAddress

  • HasAttachments

The Office365 Calendar adapter

You can use this adapter both for receiving events as for transmitting events. To be able to receive/send events you need to have the XSD schemas for both operations. You will find these schemas here:

Program Files (x86)Microsoft BizTalk Server 2016SDKSchemas

Related to calendars, this folder contains the following schemas:

The advantage of having these schemas is, that you can determine yourself which elements you will promote for routing purposes.

When you want to receive calendar items, you can select a calendar from an Office365 Outlook account. Next, you can configure that you want to receive events which are starting within a particular time frame.

You can also use the adapter to create events from BizTalk Server. Therefore, you can, populate a message according the above mentioned Send schema. Yet, some event properties can also be set on the Send Port. The properties you can set on a Send Port are:

The Office365 Contact adapter

You can use the Contact Adapter for creating contacts in Office365. For this adapter too, Microsoft has provided a schema. You will find this schema in the same location as the Calendar schemas and has the following name:

Office365OutlookContactSend.xsd

Again, because you can add this schema to your BizTalk solution, you can determine yourself which fields you would like to promote. The Send Port configuration only allows you to sign in with an Office365 account. You cannot configure any contact properties on the Send Port.

Note: To be able to use the Office365 adapters from BizTalk, besides Feature Pack 3, you need to install TMS. This service refreshes the Office OAuth tokens which BizTalk uses. After installation of the Feature Pack, navigate to the installation folder of BizTalk Server (Program Files (x86)Microsoft BizTalk Server 2016).  There you will find BizTalkTMS.msi, which you must install.

Read this article for more details about the Office365 adapters for BizTalk Server 2016.

Advanced Scheduling of Receive Locations 

Scheduling Receive Locations has always been hard with the out-of-the-box capabilities of BizTalk Server. Often people used the open source Scheduled Task Adapter which exists since BizTalk Server 2004. Currently, Sandro Pereira maintains this adapter on GitHub.

The open source Scheduled Task Adapter does a good job. But, organisations might prefer not to go for open source software, but still they might have a need to schedule Receive Location(s). Microsoft has listened to their requests and introduced Advanced Scheduling of Receive Locations with Feature Pack 3!

Below screenshots show how the scheduling capabilities of a Receive Location look like, before and after installation of Feature Pack 3.

BizTalk Server 2016 Feature Pack 3: Scheduling before Feature Pack 3BizTalk Server 2016 Feature Pack 3: Scheduling with Feature Pack 3


In case of the Feature Pack 3 scenario, the upper part of the screen
is extended with capabilities to select a time zone and to configure automatic adjustment for Daylight Saving Time (DST).

The ability of setting the time zone can help in case your integration partner(s) live in different regions of the world. Using the Time Zone drop down will make it easier to configure when Receive Locations will pick up messages according the partner’s time zone.

Daylight Saving Time, also mentioned Summer Time, is a practice which is done in a number of countries in the Northern and Southern hemisphere. During DST, the clock becomes advanced one hour close to Spring and adjusted backwards in Autumn. This way daylight lasts longer in the evening. These adjustments might effect the proper working of your interfaces. That’s why Microsoft introduced the ability to automatically adjust the schedule of your Receive Locations, according DST.

By the way: did you know that the Data Monitoring features in BizTalk360 are also compliant to Daylight Savings? Our colleague Mekala wrote an article about it. Here you have the link to that article:

Especially the Service Window capability of Receive Locations are improved hugely. The original ability to configure just a Start and a Stop time has been extended with the following recurrence features:

  • Daily – configure the number of recurring days and from which date the recurrence will be active

    BizTalk Server 2016 Feature Pack 3: Daily Service Window

  • Weekly – configure the number of recurring days, from when the recurrence will be active and on which weekdays the recurrence must be active

    BizTalk Server 2016 Feature Pack 3: Weekly Service Window

  • Monthly – configure which months and which days the recurrence should take place
    BizTalk Server 2016 Feature Pack 3: Monthly Service WindowBizTalk Server 2016 Feature Pack 3: Monthly Service Window

Conclusion

With BizTalk Server 2016 Feature Pack 3, Microsoft has released many useful features for BizTalk Server 2016. The Office365 adapters, the improved scheduling capabilities and the support of SQL Server 2016 SP2 (because of simplification of  Availability Groups) can be considered as the most useful ones.

Meanwhile, the community is also waiting for the release of BizTalk Server vNext which has been announced recently. This version of BizTalk underlines the on-going commitment of Microsoft in the platform. The new version of BizTalk will, amongst others, contain all the release Feature Packs for BizTalk Server 2016.

You can receive this kind of announcements and many other interesting articles in the Microsoft Integration space directly in your email box, by subscribing to our monthly Integration Newsletter. You can find the August edition of this newsletter, which provides more information about BizTalk vNext, here.

The post BizTalk Server 2016 Feature Pack 3 appeared first on BizTalkGurus.


Microsoft Integration Weekly Update: September 10, 2018

$
0
0

Do you feel difficult to keep up to date on all the frequent updates and announcements in the Microsoft Integration platform?

Integration weekly update can be your solution. It’s a weekly update on the topics related to Integration – enterprise integration, robust & scalable messaging capabilities and Citizen Integration capabilities empowered by Microsoft platform to deliver value to the business.

If you want to receive these updates weekly, then don’t forget to Subscribe!

Feedback

Hope this would be helpful. Please feel free to reach out to me with your feedback and questions.

Advertisements

The post Microsoft Integration Weekly Update: September 10, 2018 appeared first on BizTalkGurus.

Microsoft BizTalk Mapper Unable to load wrapper

$
0
0

Sometimes errors seem to find me, sometimes it fills that I’m chasing errors! And because someone did something that you shouldn’t do, configuring the build folder of a Functoid project to be <BizTalk Server installation folder>Developer ToolsMapper Extensions directory, I got a new and strange error while trying to open a BizTalk map inside Visual Studio: Microsoft BizTalk Mapper Unable to load wrapper. Here is the full error message:

Microsoft BizTalk Mapper

Unable to load wrapper <BizTalk Server installation folder>Developer ToolsMapper ExtensionsMicrosoft.BizTalk.Interop.Agent.dll

Microsoft BizTalk Mapper Unable to load wrapper

Of course, at that time I was quite curious to know the cause of this problem because I didn’t do anything wrong, just building a custom Functoid project and a few minutes before I actually was working in a map and I was able to open without any kind of problems.

Cause

When you build a project, by default any kind of project it will add the project assemblies as well as the dependencies to the binDebug – again this is the default behavior.

In this case, by changing this behavior in a Custom Functoid project to the <BizTalk Server installation folder>Developer ToolsMapper Extensions directory, was causing the problem, because it was adding not only the custom Functoid assembly but also some BizTalk internal assemblies, in this case the Microsoft.BizTalk.Interop.Agent.dll, that are incompatible with the internal BizTalk Mapper wrapper.

Microsoft BizTalk Mapper Unable to load wrapper cause

Note: BizTalk Server installation folder>Developer ToolsMapper Extensions directory is where Visual Studio BizTalk project looks for custom functoids to be added to the Toolbox.

Solution

Once again, the solution is simple, you should delete all the unnecessary assemblies, especially the internal ones of the product.

Once you delete all the unnecessary assemblies, in this case, the Microsoft.BizTalk.Interop.Agent.dll, and I also advise to delete all the ones that are selected on the above picture, the Unable to load wrapper problem will be solved and you can once again open the BizTalk Mapper without any kind of problems inside Visual Studio

Author: Sandro Pereira

Sandro Pereira lives in Portugal and works as a consultant at DevScope. In the past years, he has been working on implementing Integration scenarios both on-premises and cloud for various clients, each with different scenarios from a technical point of view, size, and criticality, using Microsoft Azure, Microsoft BizTalk Server and different technologies like AS2, EDI, RosettaNet, SAP, TIBCO etc. He is a regular blogger, international speaker, and technical reviewer of several BizTalk books all focused on Integration. He is also the author of the book “BizTalk Mapping Patterns & Best Practices”. He has been awarded MVP since 2011 for his contributions to the integration community.

The post Microsoft BizTalk Mapper Unable to load wrapper appeared first on BizTalkGurus.

BizTalk Pipeline Components Extensions Utility Pack for BizTalk Server 2016 available on GitHub

$
0
0

I finally started and published the first version of the sibling BizTalk project Mapper Extensions UtilityPack for BizTalk Server 2016: BizTalk Pipeline Components Extensions Utility Pack

What is BizTalk Pipeline Components Extensions Utility Pack?

BizTalk Pipeline Components Extensions Utility Pack is a set of custom pipeline components (libraries) with several custom components that can be used in received and sent pipelines, which will provide an extension of BizTalk out-of-the-box pipeline capabilities.

BizTalk Pipeline Components Extensions Utility Pack

What’s to expect in this version?

Content-Based Routing Pipeline Components

CBR IDoc Operation Promotion Encode component (CBRIdocOperationPromotionEncode)

  • Content-Based Routing Component to promote IDOC Operation property.
    • This component requires one configuration that is the MessageType string to be ignored. Then it will take the last string (word) from the MessageType Message Context Property and promote it to the Operation Message Context Property.
    • This component is to be used on the Encode stage of BizTalk Server Send Pipelines and to be used exclusively on Send Ports.

CBR Operation Promotion Encode component (CBROperationPromotionEncode)

  • Content-Based Routing Component to promote Operation property.
    • This component doesn’t require any configuration. Then it will take the value (word) which lies ahead of the cardinal (#) from the MessageType message context property and promote it to the Operation Message Context Property.
    • This component is to be used on the Encode stage of BizTalk Server Send Pipelines and to be used exclusively on Send Ports.

The project is available on BizTalk Server Open Source Community repository on GitHub (https://github.com/BizTalkCommunity) and everyone can contribute with new pipeline components that can extend or improve the existing BizTalk Server capabilities.

At the moment it is only available for BizTalk Server 2016 but it will soon be compiled and available for previous versions of the product.

Special thanks to my team coworker at DevScope: Pedro Almeida for helping me on this project.

Deploying Pipeline Components

All the .NET pipeline component assemblies (native and custom) must be located in the Pipeline Components folder to be executed by the server. If the pipeline with a custom component will be deployed across several servers, the component’s binaries must be present in the specified folder on every server.

You do not need to add a custom pipeline component to be used by the BizTalk Runtime to the Global Assembly Cache (GAC).

To know more about Deploying Pipeline Components, please see: Deploying Pipeline Components

Where to download?

You can download BizTalk Pipeline Components Extensions Utility Pack from GitHub here:
BizTalk Pipeline Components Extensions Utility Pack
GitHub

Author: Sandro Pereira

Sandro Pereira lives in Portugal and works as a consultant at DevScope. In the past years, he has been working on implementing Integration scenarios both on-premises and cloud for various clients, each with different scenarios from a technical point of view, size, and criticality, using Microsoft Azure, Microsoft BizTalk Server and different technologies like AS2, EDI, RosettaNet, SAP, TIBCO etc. He is a regular blogger, international speaker, and technical reviewer of several BizTalk books all focused on Integration. He is also the author of the book “BizTalk Mapping Patterns & Best Practices”. He has been awarded MVP since 2011 for his contributions to the integration community.

The post BizTalk Pipeline Components Extensions Utility Pack for BizTalk Server 2016 available on GitHub appeared first on BizTalkGurus.

Extended Import/Export Configuration – Part 2

$
0
0

This is a sequel blog to my post about the Export/Import Configuration feature. Along with BizTalk Reports and Knowledge Base, we also brought import/export capabilities for Dashboards and Custom Widgets.

A BizTalk administrator needs to perform many tasks every day. When the time comes to analyse or visualize BizTalk data, it can be difficult to break it down and discover exactly what you need to know. By building a BizTalk360 dashboard, the administrator can get a better look at exactly the information of a specific environment. BizTalk admins can create such insightful dashboard for four different sections in BizTalk360:

  • Operations
  • Analytics
  • EDI
  • ESB

The Dashboard options are great and they help to monitor and troubleshoot your environments proactively. However, the downside is that, it can take some time to craft the different dashboards you want and subject matter expertise to display the relevant metrics needed to troubleshoot a specific issue. The Dashboard Import/Export feature allows you to export your fine-tuned, purpose-built Dashboard screens, and import the ones that have been shared with you.

Exporting Dashboards

BizTalk360 admins can export all the available dashboards under each environment in BizTalk360.  Using this capability, users can import all the configured dashboards or any specific ones.

Scenario 1: For their business needs, BizTalk administrators can manage multiple environments. If the admin wants to migrate the Dashboard configuration from one environment to another, the Admin can export the configuration in one environment and import it into another one. Even the globally created dashboards can be imported and exported.


Export Dashboard

Importing Dashboards

The BizTalk admins can import the exported Dashboard configurations from another environment. The admin can create new dashboards and can also overwrite existing dashboards in the target environment. 

Import Dashboard

Having said already, the Dashboards are user specific. This means that users, for which dashboards will be exported and imported between environments, need to exist in the target environment. So, while importing dashboards from one environment to another, make sure the user is existing in the User Access Policy screen. If, by any chance, that specific user does not have a profile in the destination environment, it can be created by using the User Access Policy import capability.

Import User Access Policy

If the user does not have the access for the particular environment in the User Access Policy screen, then the admin cannot import the dashboard for the specific user. Hence, the user must be available in the destination environment.

User not exist in dashboard

In case, the user may exist in a Windows NT Group, then the admin can import the dashboard by providing the NT Group name.

NTGroup user

The result of the imported Dashboards is shown in a nicely formatted grid view, with an explanation of what happened with each Dashboard during the import process.Result summary of Dashboard

Exporting Custom Widgets

The import and export custom widgets implementation is mainly to handle the custom widgets in dashboards. Because, when a dashboard contains any custom widgets, then it will not get exported along with the dashboard functionality.  The user can export the needed custom widgets along with the dashboard from one environment to another environment.

Export Custom Widget

Note: The widgets are not environment specific. All the available widgets will be accessible for all the environments.

Importing Custom Widgets

Importing custom widgets is done by uploading an export file. Using the import functionality, the widget can be imported into other environment or used to restore widgets to the same environment. The Import process takes into consideration, if the widget already exists in the destination environment (widgets are not duplicated). If so, it will be overwritten. 

Import selection Widget - OverwriteIn case the user still wants to import that widget into the destination environment, the user can edit the original name of the widget, thereby making sure that the widget will become created in the destination environment.

Import Selection widget - CreateThe results of an import are shown in a nicely formatted grid view with an explanation of what happened with each widget during the import process.result summary custom widget

Scenario 2:  While Exporting and importing a dashboard into another environment, the dashboard can contain custom widgets for any kind of data visualization or analysis. Those custom widgets won’t be imported with the Dashboard because, in BizTalk360, the custom widgets are handled separately. In such case, the user can Export the Dashboard along with the custom widgets and import then in the required environment. This will reduce the time on manual creation of each custom widget.


dashboard and custom widget

Conclusion

The Import/Export functionality in BizTalk360, tremendously reduces the time of migrating the data configuration form one environment to another. For the business user, it helps to create dashboards in multiple environments and the user can create the dashboards into collaborative group easily.

The post Extended Import/Export Configuration – Part 2 appeared first on BizTalkGurus.

Processing Feedback Evaluations (paper) automagically with SmartDocumentor OCR, Microsoft Flow & Power BI

$
0
0

Some time ago I wrote a blog post on how to Process Feedback Evaluations (paper) automagically with SmartDocumentor OCR, Logic Apps, Azure Functions and Power BI, at that point there weren’t so many of the functionalities that we have at the moment both on Logic Apps and Microsoft Flow: like concept of variables, Case operations, more expressions an so on. I will not address here in this blog post if can we redesign to be different or better. The question I raise and will address here is: can we do the same with Microsoft Flow, instead of using Logic Apps?

And the reason I ask this question is that Microsoft Flow is more targeted to Business Users which fits perfectly with scenarios in which we want to extend a product to fit each business users’ requirements/scenarios. If you have an Office365 you can use Microsoft Flow and you will have 2,000 runs per month, so you don’t need to pay extra for using Logic Apps, you can instead use Microsoft Flow.

And the answer is: Yes, you can!

The problem and scenario will be exactly the same: How can we easily convert paper in data to generate additional value? How can we perform operations on it and easily gain insights?

Processing Feedback Evaluations Paper: The Problem

But in this case, to solve this problem, in which I wanted to have the evaluations forms to be processed in real-time, i.e., as the attendees handed in the forms, the results were presented in a public Power BI dashboard in a matter of seconds, we will be using:

  • DevScope SmartDocumentor OCR that, not also allowed me to extract the data from my documents and easily integrate with other systems, but also to intelligently set my OCR streams (flows), defining:
    • Different receive locations, like FTP, file or directly from scanner devices;
    • Create/test my recognition templates and review/ validate the data which is gathered;
    • But also, enabled me to connect and send the metadata, XML or JSON, through any kind of HTTP service, I could even extend it by using a PowerShell provider that would enable me to execute a PowerShell script.
  • Microsoft Flow that allows all type of Business Users to create and automate workflows across multiple applications and services without the need for developer help in a very simple and fast way. These automated workflows are called flows.
  • And finally, Power BI to create interactive data visualization (dashboards and reports)

Processing Feedback Evaluations Paper: The Solution

Processing Feedback Evaluations: The solution

SmartDocumentor: to process and extract metadata from paper

Again, I’m not going to explain in details how the solution is implemented inside DevScope’s SmartDocumentor for it is not the point of this article, and if you want to know more about it, you can always contact me. However, let me contextualize you:

  • SmartDocumentor OCR flow will be listening in two receive locations: Share Folder and directly from the scanner device;
  • After receiving and extract the data from the scanned documents (paper), SmartDocumentor will send the metadata to a Microsoft HTTP endpoint.

SmartDocumentor OCR Review Station: Survay Template

  • Inside the SmartDocumentor processes, we optional can specify if we want to review the documents – SmartDocumentor Review Station – before you sent to the Microsoft Flow (or any other system).

02-Flow-Processing-Feedback-Evaluations-paper-SmartDocumentor-Flow-Solution

Power BI to deliver interactive data visualization (dashboards and reports)

Regarding Power BI, Microsoft Flow Power BI connector (is the same of the Logic Apps connector) only accepts you to use streaming datasets (this has advantages and some disadvantages that we will see further on), that allows you to easily build real-time dashboards by pushing data into the REST API endpoint. To create your streaming datasets, you should access to Power BI with your account:

  • Select your ‘Workspace à Datasets’, and then on the top right corner click ‘+ Create’ and then ‘Streaming dataset’

Processing Feedback Evaluations Paper: Create Power BI Streaming Dataset

  • In the ‘New streaming dataset’, select ‘API’ and then click ‘Next’
  • In the second ‘New streaming dataset’, give a name to your dataset: “FeedbackForm” and then add the following elements:
    • SpeakerName (Text) – represents the name of the speaker that is obtained in the evaluation form according to the session.
    • ContentMatureFB (Number) – a value between 1 and 9 that is obtained in the evaluation form
    • GoodCommunicatorFB (Number) – a value between 1 and 9 that is obtained in the evaluation form
    • EnjoySessionFB (Number) – a value between 1 and 9 that is obtained in the evaluation form
    • MetExpectationsFB (Number) – a value between 1 and 9 that is obtained in the evaluation form
    • SpeakerAvrg (Number) – A simple average calculation (sum all the above metrics divide by 4)
    • WhoAmI (Text) – represents the type of attendee you are (developer, architect, …) that is obtained in the evaluation form
    • SpeakerPicture (Text) – picture of the speaker according to the session that is that is obtained in the evaluation form.

Processing Feedback Evaluations Paper: Power BI Streaming Dataset

  • And because we want to create interactive reports in order to have more insights from the event. We need to enable ‘Historic data analysis’ and then click ‘Create’

Unfortunately, streaming dataset is meant to be used for real-time streaming and is a little limited in terms of want we can do with it. For example, it doesn’t allow you to combine different sources, for example, a “table” that can correlate speaker to get their pictures, or to make aggregations of metrics like “Speaker average”. Which means that we need to send all of this information from Microsoft Flow.

Microsoft Flow to create an integration process flow

At the beginning of this article, I told that one of the advantages of Microsoft Flow is that allows Business Users to create and automate workflows across multiple applications and services without the need for developer help. So, for this example, I will try to abstract from the fact that I am a developer and “try” to implement as if I were a business user: no custom code is allowed!

Microsoft Flow it will be the component that will allow us to extend a product (OCR software) that, as all products, are limited to certain features and capabilities to be able to communicate with a huge range of SaaS applications that appear all day on the market.

In order to integrate SmartDocumentor OCR with Power BI, we need to create a Microsoft Flow that:

  • Accept a JSON through an HTTP Post. For that, we use a ‘Request – When a HTTP request is received’ trigger.

Processing Feedback Evaluations: Flow process - HTTP trigger

    • And, because we do have friendly tokens to access the elements of the message, we will use a sample of the JSON message to be able to generate the correct JSON Schema. For that you should:
      • From the trigger configuration box, select the option “Use sample payload to generate schema” and past the above sample:

[
{
“Key”: “RecognitionRating”,
“Value”: “100”
},
{
“Key”: “RecognitionStatus”,
“Value”: “Final”
}
]

      • To generate the JSON schema, click “Done”

Processing Feedback Evaluations: Flow process - HTTP trigger Schema

  • Next, we need to create the following support variables, that we will use to store the data extracted from the SmartDocumentor JSON message – that is a Name/value typed message – to be sent to Power BI dataset:
NameTypeInitial Value
countInteger0
speakerNameString
PictureString
ContentClearString
GoodCommunicatorString
EnjoySessionString
MetExpectationString
whoAmIString
    • For that, we need to add a ‘+New step’, ‘Add an action’ and then enter Variables’ into the search box. Select “Variables – Initialize variable” from the actions list.

Processing Feedback Evaluations: Flow process - Variables

    • And repeat the same task for all the variables.

Note: Unfortunately, to the date, there is still no way to create multiple variables using a single shape. In my opinion, this could and should be made as a table approach instead of the existing approach.

Now that we have all our variables that we need to store the information that we need to extract from the SmartDocumentor JSON message, we need to start extracting based on the Evaluation form. The first part of the form is: “What session are you evaluating”:

Processing Feedback Evaluations: Flow process -Evaluation Form

and for us to find out what session is being selected so we can “map” the speaker and picture name we need to look for the keys “S1”, “S2”, “S3” and “S4” and see which on them is filled. To do that we need to:

  • Add a ‘+New step’, ‘… More’ and then select ‘Add a switch case’

Processing Feedback Evaluations: Flow process - Switch case

    • On the “On” property of the switch condition configuration, select from the list of tokens the “Key” token from the “When a HTTP request is received” trigger

Processing Feedback Evaluations: Flow process - Switch case configuration

    • Because this is a Key/Value messages with multiple records, the Flow designer will automatically place this switch condition inside a Loop that will iterate thru each key/value pair.
  • In the first case, let rename it ‘Case S1’ branch configuration:
    • On the “Equals” property, type “S1”
    • And then add a new condition by selecting ‘… More’ and then select ‘Add a condition’
      • On the ‘Yes’ branch
        • Choose the “Add an action” option and on the “Choose an action” window, enter “Variables” and select the trigger “Variables – Set variable”
        • And set the “Picture” variable to the desired value
        • Do the same steps this time to set the “speakerName” variable
      • Leave the ‘No’ branch as it is

Processing Feedback Evaluations: Flow process - Switch case 1

  • Add 3 more new Case branches and repeat the same steps, this time configuring the values to look for “S2”, S3” and “S4”.

The second part of the form is: “What is my evaluation”:

Processing Feedback Evaluations: Flow process - Evaluation Form

To extract this information, and because we already have a Switch case condition in place, what we need to do is:

  • Create 4 new different branches in the Switch case condition, one for each question – “Q1”, “Q2”, “Q3” and “Q4” – and then:
    • On the “Equals” property, type “Q1”
    • And then Choose the “Add an action” option and on the “Choose an action” window, enter “Variables” and select the trigger “Variables – Set variable”
      • And set the “ContentClear” variable to the rate provided by selecting from the list of tokens the “Value” token from the “When a HTTP request is received” trigger
    • Do the same steps for
      • “Q2” to set the variable “GoodCommunicator”
      • “Q3” to set the variable “EnjoySession”
      • “Q4” to set the variable “MetExpectation”

Processing Feedback Evaluations: Flow process - Set variables

Finally, the last section is about “Who am I”

12-Flow-Evalation-Who-am-I

This is probably the more complicated section. Here, we basically want to travel from a range of position and if this is selected we append to a string separated by a comma, something like “Developer; Student”. To do that we need to:

  • On the Default branch, add a new condition by selecting ‘… More’ and then select ‘Add a condition’
    • In the condition expression, select “Edit in advanced mode” and then type the condition to treat the key/name pair if “count” variable is >13 and less or equal with 28
@and(greater(variables('count'), 13),lessOrEquals(variables('count'), 28))

Processing Feedback Evaluations: Flow process - condition advance expression

    • On the ‘Yes’ branch
      • We need to check if “tag” is selected or not. If yes set we need to add to the “whoAmI”, otherwise we don’t do nothing. To do that we need an extra if condition: Add a new condition by selecting ‘… More’ and then select ‘Add a condition’
        • On “Choose a value” property select the “Key” token from the “When a HTTP request is received” trigger.
          • On the condition set “Is not equal to”
          • And in the other “Choose a value” property leave it empty

Processing Feedback Evaluations: Flow process - Anothe condition

      • However, to set properly the “whoAmI” variable we need another additional condition to check if the “whoAmI” variable is empty or not. If empty set the “whoAmI” variable with the value, otherwise append to the existing value a comma and the new value. To do that we need to:
        • Add a new condition by selecting ‘… More’ and then select ‘Add a condition’
          • On “Choose a value” property select the “whoAmI” token from the “Variable” context.
          • On the condition set “Is not equal to”
          • And in the other “Choose a value” property leave it empty
      • On the “Yes” condition, choose the “Add an action” option and on the “Choose an action” window, enter “Variables” and select the trigger “Variables – Set variable”
        • And set the “whoAmI” variable to the desired value – select the “Key” token from the “When a HTTP request is received” trigger.
      • And on the “No” condition, choose the “Add an action” option and on the “Choose an action” window, enter “Variables” and select the trigger “Variables – append to string variable”
        • And set the “whoAmI” variable to the desired value – select the “Key” token from the “When a HTTP request is received” trigger.

Processing Feedback Evaluations: Flow process - condition chain

  • Finally, after the Switch case condition, and just before finishing the “Apply to each” cycle
    • Choose an action” window, enter “Variables” and select the trigger “Variables – Increment variable”
      • On the “Name” property select the “count” variable
      • And on the “Value” set as 1

Processing Feedback Evaluations: Flow process - increment count

To finalize the entire process, we just need to:

  • Calculate the rate average – the sum of all question results divided by the number of questions.
  • And send it to Power BI

To accomplished that we need to:

  • Add a ‘+New step’, ‘Add an action’ and then enter “Variables” into the search box. Delect the trigger “Variables – Initialize variable”
    • On the “Name” property select the “SpeakerAvrg” variable
    • On the type property set to be Integer
    • And in the Value property, from the context dialogue box, select “Expression” tab and set the following expression:
int(div(add(add(int(variables('ContentClear')), int(variables('GoodCommunicator'))) , add(int(variables('EnjoySession')), int(variables('MetExpectation')))),4))

Processing Feedback Evaluations: Flow process - calculate average

  • In the last step of the Logic App: we push the data into the Power BI streaming dataset created earlier by using the new ‘Power BI’ Connector. To do this we need to:
    • Add a ‘+New step’, ‘Add an action’, and then enter ‘Power BI’ into the search box. Select “Add row to streaming dataset” from the actions list.
      • Select the name of the workspace and then the name of the streaming dataset
      • The next step is to select the Table titled “RealTimeData”
      • And finally, map the properties with the different variables tokens has in the picture

Processing Feedback Evaluations: Flow process - Power BI

Give a proper name to the flow and save it

The end result

After saving the Microsoft Flow and process the Evaluation forms, the result is this beautiful and interactive report that we can present in a monitor during the breaks of our events:

Processing Feedback Evaluations paper: SmartDocumentor Logic App process Power BI dashboard

Author: Sandro Pereira

Sandro Pereira lives in Portugal and works as a consultant at DevScope. In the past years, he has been working on implementing Integration scenarios both on-premises and cloud for various clients, each with different scenarios from a technical point of view, size, and criticality, using Microsoft Azure, Microsoft BizTalk Server and different technologies like AS2, EDI, RosettaNet, SAP, TIBCO etc. He is a regular blogger, international speaker, and technical reviewer of several BizTalk books all focused on Integration. He is also the author of the book “BizTalk Mapping Patterns & Best Practices”. He has been awarded MVP since 2011 for his contributions to the integration community.

The post Processing Feedback Evaluations (paper) automagically with SmartDocumentor OCR, Microsoft Flow & Power BI appeared first on BizTalkGurus.

Stop Alerts for Maintenance during Business Holidays

$
0
0

Introduction

We are super excited to announce the availability of another interesting improvement in our upcoming version! BizTalk360 will allow you to setup monitoring maintenance, based on the business holidays configured for the environment.

Sometimes, administrators setup the maintenance period during new deployments or installation of security patches in their BizTalk environment. In such situations, to temporarily stop the monitoring in BizTalk360, there is a feature available “Stop Alerts for Maintenance”. Using this capability, the user can set the multiple future maintenance windows to stop false alerts being triggered from BizTalk360. This feature can be found in the Settings area of the application.

Stop Alerts for Maintenance during public Holidays_settings section

Initially, BizTalk360 allowed users to set only a single maintenance window. From v8.8 onwards, users can setup multiple future maintenance windows. So, during these maintenance periods the alarms will be disabled and no notifications will be sent from BizTalk360. At the same time, a maintenance notification will be shown in the Home dashboard and in the Stop Alerts for Maintenance Settings section. Refer to this article, to know more about this enhancement.

What is the new enrichment?

The basic idea here, is that perhaps if a user is able to setup multiple maintenance windows, they need to configure the business holidays individually. It will take much of your time, to configure for every single environment in BizTalk360. To reduce the time and ease the maintenance configuration for the users, the capability to add business holiday calendars has been introduced.

Stop_Alerts_for_Maintenance_during_business_Holidays_business_Holiday_calendar_tab_sub_section_in_settings_section

What is a business holiday calendar?

BizTalk360 provides this new capability to configure the business holidays in a calendar. These business holiday calendars can be mapped during maintenance window setup. This new configuration section is introduced in the Monitoring Notification settings section as “Configure Business Holidays”.

Using this intuitive UI, users can configure the business holidays in a calendar and save it for further mapping during the maintenance setup process.

Stop_Alerts_for_Maintenance_during_business_Holidays_Create_new_business_Holiday_Calendar

Let’s take an example: as a user, I wanted to configure a calendar for London business holidays. By clicking the “New” button, you can access the screen to configure the business holiday calendar.

Stop_Alerts_for_Maintenance_during_business_Holidays_business_holiday_calendar_configuration_section

After providing the basic details (Holiday Calendar Name, Description, Status), you can configure the dates for the business holiday in the Calendar Configuration part of the screen. For each date selection, a set of text boxes will be generated. The user has the liberty to provide their own text for the selected dates. On the right-hand side of the calendar configuration section, there are two checkboxes. Using these checkboxes, a user can include Saturdays and Sundays in the maintenance window. You can select both options or either one option, based on the business need.

Stop-Alerts-for-Maintenance-during-public-Holidays_Adding_public_holidays_to_the_calendar

Once the calendar is configured with business holidays, the user can save it for further use. The calendar will be listed in the Manage Business Holiday grid view. At any point in time, a user can add/delete new business holidays to the existing calendar configuration and save it. The changes will be updated automatically and maintenance will happen accordingly.

Preventing the business holiday calendar from accidental deletion

There is a chance that a configured calendar becomes deleted accidentally. The UI is designed in such a way that accidental deletion of calendars which are associated with maintenance windows is prevented. By any chance, if a user tries to delete a calendar which is associated with a maintenance window, a message will be shown in the UI that deletion is prevented.

Stop_Alerts_for_Maintenance_during_business_Holidays_business_Holiday_Calendar_Delete_Scenario_error_message

How to associate the business holiday calendar to maintenance windows?

In the Stop Alerts for Maintenance settings page, A new section is introduced to configure the business holiday calendars. All the configured calendars with Status enabled will be displayed in the “Select Business Holiday Calendar” dropdown list. A user can select the desired calendar and use it for a maintenance window. During the business holiday, a maintenance window will be active.

Stop_Alerts_for_Maintenance_during_business_Holidays_Holiday_Calendar_association_for_alert_maintenance

There is a new tab “Business Holidays” added in the grid section to view the configured business holidays to the calendar.

Stop_Alerts_for_Maintenance_during_business_Holidays_List_of_dates_configured_in_the_calendar_will_be_displayed

Excluding alarms during maintenance

wherewith this capability, users can exclude alarms during the maintenance. This means, that, except the selected alarms, other alarms will undergo maintenance.

Scenario: Enable Monitoring for few alarms (for example to monitor system resources) during deployments or security patch updates.

Let’s consider a situation, where administrators have configured critical alarms to monitor the system resources (CPU usage, Memory usage) of their BizTalk Environment in BizTalk360. It is important to monitor these resources in their BizTalk Environment to identify any performance glitches as early as possible to avoid significant business consequences.

In such scenarios, there will be a need to keep those alarms always on. Though the environment is in maintenance mode, if administrators wanted to monitor their system resources, they can make use of this new capability.

This capability is very useful in situations where administrators don’t want to receive alerts during the weekends except for few alarms.

Stop_Alerts_for_Maintenance_during_business_Holidays_Exclude_alarms_during_maintenance_option

Conclusion

Definitely, these improvements are like icing on the cake to our existing Stop Alerts for Maintenance capability. Happy migrating and try BizTalk360!!!

Get started with the free 30 days trial. For any queries/feedback please write to us support@biztalk360.com.

Author: Mekala Ramesh

Test Lead at BizTalk360 – Software Testing Engineer having diverse exposure in various features and application testing with a comprehensive understanding of all aspects of SDLC. Strong knowledge to establish the testing process from the scratch. Love to test the software product to deliver it with good quality. Strongly believes on “Testing goes beyond just executing the test protocol”.

The post Stop Alerts for Maintenance during Business Holidays appeared first on BizTalkGurus.

Microsoft Integration Weekly Update: September 17, 2018

$
0
0

Do you feel difficult to keep up to date on all the frequent updates and announcements in the Microsoft Integration platform?

Integration weekly update can be your solution. It’s a weekly update on the topics related to Integration – enterprise integration, robust & scalable messaging capabilities and Citizen Integration capabilities empowered by Microsoft platform to deliver value to the business.

If you want to receive these updates weekly, then don’t forget to Subscribe!

Feedback

Hope this would be helpful. Please feel free to reach out to me with your feedback and questions.

Advertisements

The post Microsoft Integration Weekly Update: September 17, 2018 appeared first on BizTalkGurus.


Web Endpoint Monitoring Improvements in 8.9 Version

$
0
0

Introduction

In real time scenarios, monitoring all the HTTP endpoints in an environment is a complex process. Constantly monitoring the web endpoints which are running and produce the expected results for each execution is tedious.  In a BizTalk environment, the health of Web Endpoints is vital to be able to process the data between multiple applications/partners.  BizTalk Administrators manually monitoring the health and results of web endpoints in every execution is a cumbersome process. To overcome this challenge in BizTalk360, Web Endpoint Monitoring is introduced during 7.x version and it is received positive feedback about Web Endpoint Monitoring. We are constantly improving this feature. During  8.1 version, this feature had added functionalities like configuring custom HTTP headers, Payload details and additionally Response configuration like Return Code Alerts, Keyword Alerts, Response Time Alerts for every monitored web endpoint.

Web Endpoint monitoring is important in BizTalk Integration; Based on the feedback’s received, we decided to further improve the web endpoint monitoring to meet their business needs.  Most of the customers, who provided feedback, requested to support additional authentication methods in web endpoints like:

  • Basic
  • SSL client certificate support to Basic & Windows authentication
  • Azure Services

Additional Authentication Support

Prior to BizTalk360 version 8.9, Web Endpoint monitoring supported Windows authentication to monitor the endpoints.  From 8.9 version on, BizTalk360 Web Endpoint authentication is extended to support:

  • Basic Authentication
  • Certificate Authentication
  • Azure Services Authentication

Below, we have a better look at each of the added authentication methods.

1. Basic Authentication

In the context of an HTTP transaction, Basic Access authentication is a method for an HTTP user agent to provide a user name and password when making a request. To unauthenticated requests, the server should return a response whose header contains a HTTP 401 Unauthorized status and a WWW-Authenticate field. In the BizTalk Admin Console, an HTTP endpoint can provision Basic authentication with a username and password.

Basic Authentication Details

2. Certificate Authentication

For monitoring HTTP web endpoints with SSL certificate settings, a client certificate thumbprint is provided in BizTalk HTTP transport properties, along with user name and password. A client-based certificate thumbprint is used to negotiate the server-side certificate. 

BizTalk HTTP Transport Properties:

HTTPTransportProperties

Similarly, In BizTalk360, the authentication type of Basic or Windows along with the client certificate thumbprint is configured in the Authorization section of Web Endpoint monitoring.  

SSL Client Certificate Thumbprint

Note: Client certificates must be installed in the machines where BizTalk360 Web and Monitoring services reside.

3. Azure Services Authentication

 To be able to use Azure Services Authentication, a Service Principal must be configured in Azure.

To be able to use Azure Services Authentication, a Service Principal must be configured in Azure. A Service Principal is an application within Azure Active Directory whose authentication tokens can be used as the client Id, client secret, and tenant fields (the subscription can be independently recovered from your Azure account details). With a Bearer Token being generated, using the Service Principal authentication takes place at the Web Endpoint.

There are two tasks needed to create a Service Principal via the Azure Portal:

  1. Create an Application in Azure Active Directory (which acts as a Service Principal)
  2. Grant the Application access to manage resources in your Azure Subscription

     You can check how to create service principal in Azure Portal.

Content Type Support

The Content-Type entity header is used to indicate the media type of the resource. In responses, a Content-Type header tells the client what the content type of the returned content is. Browsers will do MIME sniffing, but in some cases, they will not necessarily follow the value of this header. To prevent this behavior, the header X-Content-Type-Options can be set to “nosniff”. In requests, (such as POST or PUT), the client tells the server what type of data is sent.


Web Endpoint Pay Load Details

 BizTalk360 8.9 extends the support to additional content types in request and response objects:

  1. SOAP (1.2) Content Type:  “application/soap+XML” is a SOAP 1.2 content type which is added to the list. With this additional content type, SOAP V1.2 protocol is supported in web endpoint monitoring. The user can configure the XPath conditions to monitor the SOAP 1.2 endpoints, based on the results of the execution.                                                                                                             
  2. Custom Content Type:  When Endpoint Request/Response content types are not supported by BizTalk360, the Web Endpoint throws a HTTP 415 Unsupported Media Type. To prevent this from happening, you can configure Custom Content types.  From the Request/Response content type drop downs, BizTalk360 allows you to select custom content type. When this option is chosen, users can enter Content Types which are not supported by BizTalk360, out-of-the-box, like:
    1. application/EDI-X12(application)
    2. text/CSV(Text)
    3. application/vnd.ms-excel (VDN)

Deprecation of TLS 1.0

The TLS 1.0 encryption protocol can no longer be used for secure communications in most of industries like PCI (Payment Card Industry). All web servers and clients must transition to TLS 1.1 or above. This deprecation will primarily affect non-browser software, APIs, and other internet infrastructure. Older versions of development tools which don’t support TLS 1.2, such as curl, are still widely in use—either directly by developers or as dependencies bundled into other software

BizTalk360 Web Endpoint monitoring throw an error when TLS 1.0 is disabled. From BizTalk360 version 8.9, Web Endpoint monitoring supports the TLS encryption protocol (TLS 1.1 and TLS 1.2), when TLS 1.0 is disabled.

Conclusion

The Web Endpoint monitoring improvements in this version will be helpful to monitor additional web endpoints. BizTalk Administrator/Developers can utilize the powerful Web Endpoint Monitoring feature in BizTalk360 with additional authentication type and content type.

Get started with the free 30 days trial. For any queries/feedback please write to us support@biztalk360.com.

Author: Senthil Palanisamy

Senthil Palanisamy is the Technical Lead at BizTalk360 having 12 years of experience in Microsoft Technologies. Worked various products across domains like Health Care, Energy and Retail.

The post Web Endpoint Monitoring Improvements in 8.9 Version appeared first on BizTalkGurus.

BizTalk Server and GDPR whitepaper

$
0
0

Finally, my latest whitepaper has been published: “BizTalk Server and GDPR“! After doing several GDPR assessments and talked a little about this topic on INTEGRATE 2018 London event I thought this should be the next logical step considering that this is a topic that has worried a lot of BizTalk Server customers, and still worries, and in a more general way all organizations regardless of whether they use or not BizTalk Server.

BizTalk Server and GDPR

In a general way, BizTalk Server is GDPR compliant – in fact Microsoft Product group announced in INTEGRATE2018 London Event that one of the features of BizTalk Server 2016 Feature Pack 3 (FP3) was FIPS and GDPR privacy standards compliant, but that was just a marketing strategy since, in its most simplistic form, BizTalk Server is a messaging broker, which doesn’t capture or store any type of data on its system other than for the time needed to complete business processes and to connect and route messages to their target systems. However, because you can process messages and/or communicate with systems that contain sensitive data (personal data) you must have some good practices in BizTalk Server Applications to comply with GDPR. So, in other words, BizTalk Server is GDPR compliant but your BizTalk Applications may not be.

What to expect about BizTalk Server and GDPR whitepaper

BizTalk Server is part of complex enterprise IT environment, we also need to guarantee that these BizTalk Server environments are GDPR compliant. This white paper intends to provide key points on how you can archive and deploy secure integrations in BizTalk Server, and how you can ensure and/or help organizations for this complex middle piece, become GDPR compliant.

This whitepaper will cover the impact of the new regulations and what needs to be done with a focus exclusively on BizTalk Server environments.

Where I can download it

The whitepaper is completely free and you can download it here:

I would like to take this opportunity also to say thanks to Lex Hegt for helping me reviewing this whitepaper especially for the incredible work of him correcting my horrible English and in this way make the document and my thoughts being readable.

I hope you enjoy reading this paper and any comments or suggestions are welcome.

You can also find, download and enjoy several other free whitepapers of my own here:

Author: Sandro Pereira

Sandro Pereira lives in Portugal and works as a consultant at DevScope. In the past years, he has been working on implementing Integration scenarios both on-premises and cloud for various clients, each with different scenarios from a technical point of view, size, and criticality, using Microsoft Azure, Microsoft BizTalk Server and different technologies like AS2, EDI, RosettaNet, SAP, TIBCO etc. He is a regular blogger, international speaker, and technical reviewer of several BizTalk books all focused on Integration. He is also the author of the book “BizTalk Mapping Patterns & Best Practices”. He has been awarded MVP since 2011 for his contributions to the integration community.

The post BizTalk Server and GDPR whitepaper appeared first on BizTalkGurus.

BizTalk Server Repair Installation Error: Please insert the disk: 1

$
0
0

A funny error I found out on December 4, 2017, that I’m now recovering from my backlog to be published. While trying to repair a BizTalk Server 2016 installation on a virtual machine I got this annoying, funny and strange error: Please insert the disk: 1.

Microsoft BizTalk Server 2016 Installation Wizard

Please insert the disk: 1

BizTalk Server Please insert the disk: 1

and regardless of what I did back then, like running the execution file as an administrator, I was getting this error every time I was trying to repair the BizTalk Server installation.

And what I did back then was:

  • Attach the BizTalk Server ISO file in the DVD drive of Virtual Machine that was running in the Hyper-V;
  • And execute the installation file from the DVD drive of the VM;

Cause

Unfortunately, this message may appear if you are trying to repair the product from the CD/DVD drive and the reason is not clear for me.

I don’t know if this error occurred by the fact that in the original installation the ISO that was locally on the machine or it is just a coincidence.

Solution

The solution, however, is very simple:

  • Copy content of the BizTalk Server 2016 ISO to the local hard drive of the Virtual Machine – but I believe that this can be the same to other BizTalk Server versions;
  • And execute from the local Hard Drive the BizTalk Server setup file has an Administrator;

By doing that you will definitely solve the “Please insert the disk: 1” issue and you will be able to repair the existing installation.

Author: Sandro Pereira

Sandro Pereira lives in Portugal and works as a consultant at DevScope. In the past years, he has been working on implementing Integration scenarios both on-premises and cloud for various clients, each with different scenarios from a technical point of view, size, and criticality, using Microsoft Azure, Microsoft BizTalk Server and different technologies like AS2, EDI, RosettaNet, SAP, TIBCO etc. He is a regular blogger, international speaker, and technical reviewer of several BizTalk books all focused on Integration. He is also the author of the book “BizTalk Mapping Patterns & Best Practices”. He has been awarded MVP since 2011 for his contributions to the integration community.

The post BizTalk Server Repair Installation Error: Please insert the disk: 1 appeared first on BizTalkGurus.

User Access Policy – The New Look for Application Access

$
0
0

We are super excited to welcome our new release version of BizTalk360, v8.9. There has already been a series of blogs explaining the features coming up in the release. Here is another such blog which explains the enhancements done in the User Access Policy section in v8.9.

User Access Policy is one important feature in BizTalk360, where you can provide access to certain applications in your BizTalk environment to Normal Users and NT groups. This is not available at the BizTalk server level. The importance of this feature can be read here “Why did we build User Access Policy to Manage BizTalk Server Security?

Customer Feedback getting answered

In BizTalk360, we aim at improving the product and adding new features based on the customer feedback and business scenarios. The Feedback portal is one such platform for the customers to provide their suggestions on which can be voted by other customers, if they feel that these ideas fit in their business requirements as well. It’s based on the priority of voting the features and enhancements before getting picked up for development. One such feedback was the access to newly created BizTalk applications.

Hence, in the new release we thought of giving a fresh coat of paint to this feature, based on the feedback we received.

What’s New in User Access Policy

BizTalk360 supports management of multiple BizTalk Server environment from a single console. So, you can set up security and access rights from a single place. You can either configure security for individuals or as team (ex: Create an NT Group called “BizTalk Production Support”).

Now here comes the twist on the Application access. For your information, the rest all remains the same.

In earlier versions, it was a simple grid displaying all the available applications in a BizTalk environment and you can select the applications to provide access to Normal Users/Groups. But now we have slightly modified this, to provide multiple options for providing access to the applications. This would surely be more user friendly and of course meet the requirements. The different options include:

  • Grant Access by Applications
  • Grant Access to all Applications
  • Wildcard Search
  • Grant Access to Application Groups

Only one rule can be applied at a time. This holds for both users and groups. We shall have a detailed look at each one of them.

Grant Access to All Applications

As the name denotes, enabling this rule will provide access to all the available applications for the Normal Users/Groups. This will be similar to the permissions of the Super User who will have access to all applications.

Note: The user will automatically be granted access to all the newly created applications. The user doesn’t need to scroll down the complete list, to select the newly created application and provide access. The extra burden to check for the new applications is now reduced.

Wildcard Search

This is the new capability introduced in this release. It enables users to select the options from the wildcard operator drop down.

With the four options that are available in the Wildcard search, the user can select the required option and provide the search value. Once this rule is configured, the user will have access to all the applications matching this wildcard.  The user will automatically be given access to the newly created applications that match the wildcard.

This will save a lot of time because in a business scenario, the applications will be named based on specific activity and it would be easy for the admins to select the appropriate wildcard option and provide access. This would be quite interesting and easy option for configuring access to these applications.

Grant Access to Application Groups

We know about the BizTalk Group. But what is this Application Group? Sounds new, isn’t it? Yes, it is new to BizTalk360. With this new capability, you can create Application Groups and map the applications to that group. Once the user is given access to the Application group, he can access all the applications mapped to that group.

The Concept of Application Groups

The Application Group is something new to BizTalk360. We always aim at providing a user interface that must ease the work of the customer, with minimal configuration. You can create a group and map the related applications to that group.

Now, providing access to this application group will automatically enable the users to access the applications which are mapped to that Application Group. This Application Group is only related to BizTalk360 and not to BizTalk itself. When the corresponding Normal User logs in to BizTalk360, his access will be limited to these applications. Only Super Users can view and edit the Application Groups.

The Normal Users/Groups will have access to other modules in BizTalk360, based on the applications only. The concept of Application Groups was created to ease the work of the admins.

It is also possible to view the list of Application Groups created for an environment; editing or deletion them is done by the Super users.

Scenario

Do you know what happens if you try to delete an Application Group that is already given access to a Normal user? It is not possible to delete that Application Group. The exception message would be captured and displayed in the UI.

This way, it would be easy to identify the association between the user and the Application Group.

Would it not be interesting to try this out?

What would happen to existing user configuration?

Now that we know what the different available options are for associating the applications to new users/groups. At this point of time, there must be a question coming up on what would happen to the existing users created when we upgrade from an older version to the new version of BizTalk360.

  • Will all that information be lost?
  • Do I need to create all the users once again and configure the rules?
  • Will the user data not get migrated during the upgrade?

Lot more questions would come up during the upgrade, as this is a critical area of security and there would be different users and groups which are already created and provided access to the applications.

Please don’t panic. As promised, we always take care of your data and configuration and migrate them successfully to the new version. There will not be any data loss.

Yes, your data and configuration are safe and will be migrated successfully during the upgrade. Now, said that the data will be safe, what will happen to the User configuration data after the upgrade? There was no concept of Wildcard or Application group in the previous versions. The only which was available, was to select the applications from the grid and save them.

For persisting the existing configuration data, we have another rule available: ‘Grant Access by Application’. You will probably be happy to hear that!

Once the upgrade is completed, this will be the default rule which is selected for existing users. Once the Super users edits the details for a Normal User, this rule is selected. They can now change the rule configuration as per the requirement.

The only difference between this configuration and the other new rules is that when Grant Access by Applications is configured, newly applications created will not automatically be given access as in the other rules.

Viewing the permitted applications

Once the rule is configured, there is a view option for the admin to verify who have been provided access to which applications. Here is the option that we have given:

A view option has been provided in the User settings screen, which will list all the permitted applications for the users.

By viewing the permitted applications, the Super User can verify if the access to the applications have properly been provided to the Normal users/groups.

Conclusion

With the new look for application access, we are convinced that we brought a great new feature 😊. It will save time for the admins to provide access to users and groups. It will now be easy for users to take care of the newly created applications as well. Once the rule is configured, it is all set and no need to worry about new applications.

Happy monitoring with BizTalk360!

Author: Praveena Jayanarayanan

I am working as Senior Support Engineer at BizTalk360. I always believe in team work leading to success because “We all cannot do everything or solve every issue. ‘It’s impossible’. However, if we each simply do our part, make our own contribution, regardless of how small we may think it is…. together it adds up and great things get accomplished.”

The post User Access Policy – The New Look for Application Access appeared first on BizTalkGurus.

Microsoft Flow: How to pass the SQL data table results in a markdown-formatted table into an Email notification or Approval Requests

$
0
0

Last Friday while checking the Twitter I found a twitter from Jon Levesque asking if someone had a sample on how to took SQL data table results and passed a markdown-formatted table into an Approval Request. By coincidence, two week ago, I was helping a colleague of mine doing something similar, in that case, it was just adding a well formatted table with the results of an SQL expression to a notification email. Two different but similar scenarios.

To be able to create this simple proof-of-concept you should:

  • Access the Flow portal: https://flow.microsoft.com/ and sign in with your account
  • In flow.microsoft.com, select “My flows” in the top navigation bar, and then select “+ Create from blank” to create a Flow from scratch.
  • On the “Create a flow from blank”, select “Create from blank” to start the process of creating an empty Flow

Because this is a simple POC and it supposed to be a notification email we will be using the Scheduler trigger to start the Flow from time to time. For that you need:

  • On the Flow designer, on the Trigger event enter “Schedule” and select the option “Schedule – Recurrence”

Microsoft Flow: markdown-formatted table - Schedule – Recurrence

  • For this POC, we want to receive a notification on a daily, so on the Schedule Trigger configuration set the:
    • “Interval” property as “1”
    • And the “Frequency” property has “Day”

Microsoft Flow: markdown-formatted table - Schedule – Recurrence configuration

  • Add the next step by clicking the “+New step” button and then choose the “Add an action” option

Microsoft Flow: markdown-formatted table - Add action

  • On the “Choose an action” window, enter “SQL Server” and select the action “SQL Server – Execute a SQL query”

Microsoft Flow: markdown-formatted table - SQL Server action

Note:
This can be a different action like, get rows or execute a stored procedure.
    • After you connect to the proper SQL Server and database, on the Execute a SQL query action configuration:
      • On the “query” property, type
SELECT [Id],
       [Name],
       [Age],
       [Nacionality]
FROM [dbo].[Persons]

Microsoft Flow: markdown-formatted table - SQL Server action configuration

  • Add the next step by clicking the “+New step” button and then choose the “Add an action” option
  • On the “Choose an action” window, enter “Variables” and select the action “Variables – Initialize variable”

Microsoft Flow: markdown-formatted table - Add Variable

    • On the Variable action configuration:
      • On the “Name” property, type “lines”
      • On the “Type” property, specify the type as “String”
      • On the “Value” property leave it blank

Microsoft Flow: markdown-formatted table - Add Variable configuration

Note:
Initialize variable needs to be performed on Top Level, in other words, outside any cycle operation (Do Until or For Each). Initialize variable inside cycles are not permitted.
  • Add the next step by clicking the “+New step” button and then choose the “Add an action” option
  • On the “Choose an action” window, enter “Variables” and select the action “Variables – Append to string variable”

Microsoft Flow: markdown-formatted table - Append variable action

    • On the Variable action configuration:
      • On the “Name” property, select “lines” variable
      • On the “Value” property type
<tr>
<td style="border:1px solid black; border-collapse: collapse;">@{items('Apply_to_each')?['Name']}</td>
<td style="border:1px solid black; border-collapse: collapse;">@{items('Apply_to_each')?['Nacionality']}</td>
</tr>

Microsoft Flow: markdown-formatted table - Append variable action configuration

Note:
@{items(‘Apply_to_each’)?[‘Name’]} and @{items(‘Apply_to_each’)?[‘Nacionality’]} are inserted and selected from the list of “Execute a SQL query” action tokens
  • Because we can have multiple rows retrieved from SQL Server, the Flow designer will automatically place this “Variable – Append to string variable” inside a Loop that will iterate thru each SQL row.

Microsoft Flow: markdown-formatted table - Append variable inside loop

Now that we have our SQL rows partially well formatted in a markdown-formatted table, what we need to do is create our notification/Approval Request email. To do that we need:

  • Add the next step by clicking the “+New step” button and then choose the “Add an action” option
  • On the “Choose an action” window, enter “Office 365 Outlook” and select the action “Office 365 Outlook – Send an email”

Microsoft Flow: markdown-formatted table - outlook action

  • On the Office 365 Outlook action configuration:
    • On the “To” property, type the email for which you want to send the email
    • On the “Subject” property, type the subject of the email
    • On the “Body” property, type:
<h1>Summary</h1>
<table style="border:1px solid black; border-collapse: collapse;">
@{variables('lines')}
</table>
by www.devscope.net

Microsoft Flow: markdown-formatted table - outlook action configuration

Note:
@{variables(‘lines’)} is inserted and selected from the list of “Variables” tokens

Now the final trick for you to receive this type of email:

Microsoft Flow: markdown-formatted table - outlook email final result

instead of this:

Microsoft Flow: markdown-formatted table - outlook email initial result

On the Office 365 Outlook action configuration you need to:

  • Click on “Show advanced options”.

Microsoft Flow: markdown-formatted table - outlook advance options

  • And on the “Show advanced options”:
    • On the “Is HTML” property, select “Yes”

Microsoft Flow: markdown-formatted table - outlook advance options HTML

Author: Sandro Pereira

Sandro Pereira lives in Portugal and works as a consultant at DevScope. In the past years, he has been working on implementing Integration scenarios both on-premises and cloud for various clients, each with different scenarios from a technical point of view, size, and criticality, using Microsoft Azure, Microsoft BizTalk Server and different technologies like AS2, EDI, RosettaNet, SAP, TIBCO etc. He is a regular blogger, international speaker, and technical reviewer of several BizTalk books all focused on Integration. He is also the author of the book “BizTalk Mapping Patterns & Best Practices”. He has been awarded MVP since 2011 for his contributions to the integration community.

The post Microsoft Flow: How to pass the SQL data table results in a markdown-formatted table into an Email notification or Approval Requests appeared first on BizTalkGurus.

Microsoft Integration Weekly Update: September 24, 2018

$
0
0

Do you feel difficult to keep up to date on all the frequent updates and announcements in the Microsoft Integration platform?

Integration weekly update can be your solution. It’s a weekly update on the topics related to Integration – enterprise integration, robust & scalable messaging capabilities and Citizen Integration capabilities empowered by Microsoft platform to deliver value to the business.

If you want to receive these updates weekly, then don’t forget to Subscribe!

Feedback

Hope this would be helpful. Please feel free to reach out to me with your feedback and questions.

Advertisements

The post Microsoft Integration Weekly Update: September 24, 2018 appeared first on BizTalkGurus.

BizTalk360 High Available Setup Guide

$
0
0

High availability, Multi server, Multi-environment Infrastructure Guide

This article will help you to understand the architecture of the infrastructure details for various scenarios of high availability, multi-server and multiple environments setup.

With regards to High Availability of BizTalk360, there are few parts which can be made Highly Available/Load Balanced:

  1. The User Interface
  2.  The Windows NT services (Monitoring & Analytics)
  3. The BizTalk360 database

The User Interface (UI)

The UI, including the REST services, can be made Highly Available by installing BizTalk360 on multiple servers. By putting a software/hardware load balancer (NLB) in front of these BizTalk360 servers, the UI of BizTalk360 can be accessed via the virtual address which is provided by the NLB.
Independently whether one of the BizTalk360 servers is down, you will always be able to access BizTalk360 via the address of the NLB. This is in no way related to the high availability of the BizTalk360 NT services.

The BizTalk360 Windows NT services

Depending on the license tier a company goes for, BizTalk360 comes with the following Windows NT services:

  • One for the Monitoring activities
  • One for collecting Analytical data (only needed in case of Platinum license)

To split the responsibilities of the NT services, each of these services contains several sub-services. One of these sub-services is used for heartbeat and will be used in case BizTalk360 is installed on multiple servers.

BizTalk360 High Available Setup Guide_Monitoring Service Screen

The picture shows the BizTalk360 Monitoring Service, including its sub-services. See below list, for some more explanation about the capabilities:

  1. Refresh and Restart buttons – With the Refresh button, the status of the Monitoring service and its sub-services are retrieved. The Restart option enables you to restart the Monitoring services. As a result, the sub-services will also be restarted
  2. Start and Pause buttons – Each sub-service can be Started/Paused individually. By selecting one or more sub-services with the check boxes, you can Start/Pause multiple sub-services at once
  3. Service Name column – This column shows the name of all sub-services. Based on that, you will understand the responsibilities of each sub-service. As mentioned earlier, the Heart Beat sub-service is one of them
  4. Polling (Sec) column – Each sub service has its own polling interval, after which the sub-service will do its job. It is not possible to change this interval. In the Last Execution column, the date and time of the last execution of each sub-service is shown
  5. Current State column – This column shows the actual state of each sub-service. By default, all these sub-services should be Started
  6. Last Status – This column shows whether the last execution of the sub-service was successful or not
  7. Exception – In case the last execution was not successful, the exception of the last execution is shown in this column

To make these NT services highly available, BizTalk360 needs to be installed in multiple servers. At these servers, the BizTalk360 NT services must be started. From that moment on, the heartbeat of the services will be monitored cross-wise between the services on the BizTalk360 servers. For each (Monitoring and Analytics) service only one on either BizTalk360 machine can be Active. In other words, this is an Active-Passive configuration. Active-Active is not supported!

Below screenshot shows a configuration in which the BizTalk360 Monitoring service is installed in 2 servers. As you can see, the BTS2016LAB02 server is Active, which means that it is performing the monitoring tasks. The other server, the BTS2016LAB03, is not active. However, this server can be activated by clicking the Activate button.

Again, it is important to remember that although BizTalk360 can be installed on multiple servers, only one of these servers can be Active and performing the monitoring tasks.

BizTalk360 High Available Setup Guide_High Availability Screen

In such multi-BizTalk360 server setups, in case the heartbeat sub-service on the Active BizTalk360 machine is not responding, there is automated fail-over of the BizTalk360 NT services taking place. So, the tasks of the BizTalk360 NT services will be performed by the server which was, until then, Passive. Thereby, High Availability is reached.

The BizTalk360 database

For making the BizTalk360 database highly available, you need to use a clustered SQL instance. That could be the same SQL instance as where the BizTalk databases reside, but could also be a separate (clustered) instance.

Different standalone and multi-server scenarios

As BizTalk Server can also be made High Available and Load Balanced, there are quite a lot of different scenarios possible, with respect to the server setup of both products. Let’s have a look at the most common scenarios and see how these scenarios affect the BizTalk360 licensing.

Scenario 1 – Standalone BizTalk server and standalone BizTalk360 server

First scenario, let us see how a simple solution, like having a standalone BizTalk Server and a standalone BizTalk360 environment setup will look like.

Following are the prerequisites:

  1. 1 x BizTalk Server
  2. 1 x MS SQL Server
  3. 1 x BizTalk360 server
  4. 1 x valid BizTalk360 server license (total BizTalk Server count will be 1 in this scenario)

BizTalk360 High Available Setup Guide_Scenario1

Scenario 2 – Multiple BizTalk servers and a standalone BizTalk360 server

In our following scenario, we will see how to have multiple BizTalk Servers and a standalone BizTalk360.

Following are the prerequisites:

  1. 2 x BizTalk Server
  2. 1 x MS SQL Server
  3. 1 x BizTalk360 server
  4. 1 x valid BizTalk360 server license (total BizTalk Server count will be 2 for the BizTalk360 license)

BizTalk360 High Available Setup Guide_Scenario2

  • Though we require one BizTalk360 license, the max server count for the license, should be = 2 as BizTalk360 is licensed per number of BizTalk servers in the BizTalk group
  • If both BizTalk servers (BTSRVR1, BTSRVR2) are active, it means that this is a multi-server environment
  • If BTSRVR1 is active and BTSRVR2 is passive (or vice versa), then it is High Availability

Scenario 3 – Multiple BizTalk servers and multiple BizTalk360 servers

Below is the diagram that explains how to have a multiple server setup for both BizTalk Server and BizTalk360 servers and its pre-requisites:

  1. 2 x BizTalk Server
  2. 1 x MS SQL Server
  3. 2 x BizTalk360 servers
  4. 1 x valid BizTalk360 server license (Total BizTalk Server count will be 2 for the BizTalk360 license)

BizTalk360 High Available Setup Guide_Scenario3

In this scenario, we have used two BizTalk360 servers, pointing to the same BizTalk group, which makes BizTalk360 highly available.

Scenario 4 – 2 multi-server BizTalk groups and multiple BizTalk360 servers

Now, we will see another scenario where we have multiple BizTalk Server environments; both BizTalk Server & BizTalk360 are highly available.

Following are the prerequisites:

  1. 2 x 2 BizTalk Server
  2. 2 x MS SQL Server
  3. 2 x BizTalk360 server
  4. 2 x valid BizTalk360 licenses (total BizTalk Server count will be 2 for each BizTalk360 license)

BizTalk360 High Available Setup Guide_Scenario4

As we have seen, there can be several combinations of server setups, and it is purely based on the customer’s requirement and their infrastructural policies. What we explained are 4 various scenarios and their requirements. These are basic setups and the fundamentals will not change, even if you have other scenarios.

Author: Mekala Ramesh

Test Lead at BizTalk360 – Software Testing Engineer having diverse exposure in various features and application testing with a comprehensive understanding of all aspects of SDLC. Strong knowledge to establish the testing process from the scratch. Love to test the software product to deliver it with good quality. Strongly believes on “Testing goes beyond just executing the test protocol”.

The post BizTalk360 High Available Setup Guide appeared first on BizTalkGurus.


Receiving a RNIF exception: PIP name specified does not match the PIP specification (error number 2005).

$
0
0

PIP name specified does not match the PIP specification, this is the last RosettaNet error that tries to make my life a little bit difficult.

Fortunately, to date, Microsoft documentation has significantly improved, moving to DOCS was a good approach and community members now have the availability to help to improve the product documentation. Nevertheless, there are still some topics that the existing the documentation is obsolete, scarce or simply non-existent. One of these topics is Microsoft BizTalk Accelerator for RosettaNet.

I was receiving this error on the PublicResponderProcess orchestration, for those who are not familiar with Microsoft BizTalk Accelerator for RosettaNet (BTARN), this is a default artifact developer by Microsoft that compose a BizTalk Solution that handles PIP messages:

  • When a responder receives a request message, BTARN routes the request message from the public-process orchestration, to the private-process orchestration, to the line-of-business (LOB) program. The responder requires the response service content from the LOB program to generate a RosettaNet response message back to the initiator. Many of the elements in the response message are populated using the values from the request message. As a result, you can incorporate a map in the responder private-process orchestration to help the LOB program generate the response service-content message in the required format.

The difficult part is to “debug”/track these errors to understand what and why this is happening. The full error message in the event log was:

Source module:
PublicResponderProcess

Correlation information:
PIP Code : 3C4
PIP Version : V01.00
PIP InstanceID : 922731_20180912T050751
SourcePartnerName :
DestinationPartnerName:

Description:
Public Responder could not send an Async exception signal due to internal errors bellow:
RNIF Exception detail:-
Error code:UNP.SHDR.VALERR
Error Number:2005
Description: PIP name specified does not match the PIP specification.

BizTalk RosettaNet (BTARN): PIP name specified does not match the PIP specification

Note: this same error can occur in previous or new versions of BizTalk Server.

Cause

Again, it was difficult to understand all the internal behaviors developed by Microsoft for BTARN but basically, when you receive a PIP message you will end up receiving 4 parts:

  • The Preamble:
    • All RosettaNet messages must have a Preamble. It is specified with a DTD that is common across all messages.
    • The Preamble section of the MIME message contains elements that are global to the RosettaNet service and others that are common to the Service Header and Service Content; for example, the message standard and version used in the message.
<Preamble xmlns="http://schemas.microsoft.com/biztalk/btarn/2004/Preamble_MS_V02_00.dtd">
    <standardName>
        <GlobalAdministeringAuthorityCode>
            RosettaNet
        </GlobalAdministeringAuthorityCode>
    </standardName>
    <standardVersion>
        <VersionIdentifier>
            V02.00
        </VersionIdentifier>
    </standardVersion>
</Preamble>
  • The Delivery Header
    • The delivery header is new in RNIF 2.0 and facilitates the routing of messages through hubs. It contains the following attributes:
      • Elements for the sending and receiving of trading partner identities
      • Message date and time stamp
      • Globally unique tracking ID
<DeliveryHeader xmlns="http://schemas.microsoft.com/biztalk/btarn/2004/DeliveryHeader_MS_V02_00.dtd">
    <isSecureTransportRequired>
        <AffirmationIndicator>
            Yes
        </AffirmationIndicator>
    </isSecureTransportRequired>
    <messageDateTime>
        <DateTimeStamp>
            20180912T050743.000Z
        </DateTimeStamp>
    </messageDateTime>
    <messageReceiverIdentification>
        <PartnerIdentification>
            <GlobalBusinessIdentifier>
                xxxx
            </GlobalBusinessIdentifier>
        </PartnerIdentification>
    </messageReceiverIdentification>
    <messageSenderIdentification>
        <PartnerIdentification>
            <GlobalBusinessIdentifier>
                yyyyy
            </GlobalBusinessIdentifier>
        </PartnerIdentification>
    </messageSenderIdentification>
    <messageTrackingID>
        <InstanceIdentifier>
            922730_20180912T050744**00**
        </InstanceIdentifier>
    </messageTrackingID>
</DeliveryHeader>
    • The Service Header is specified with a DTD that is common across all messages. A separate DTD and/or XML schema for each message validates the body of the messages.
    • The Service Header helps identify the following items:
      • The PIP
      • The activity and the action to which the message belongs
      • The PIP instance
      • Information about the sender of the message
      • Information about the recipient of the message
      • The date and time at which the message was sent
      • Whether the message is a Test message or a Production message
      • Whether the sender is to be treated as an “unknown partner”
    • The Service Header format is fixed and independent of the specifics of the message contained in the payload. However, the Service Content could change based on the variance in the business content.
<ServiceHeader xmlns="http://schemas.microsoft.com/biztalk/btarn/2004/ServiceHeader_MS_V02_00.dtd">
    <ProcessControl>
        <ActivityControl>
            <BusinessActivityIdentifier>
                Notify Of Invoice Reject
            </BusinessActivityIdentifier>
            <MessageControl>
                <fromRole>
                    <GlobalPartnerRoleClassificationCode>
                        Invoice Reject Provider
                    </GlobalPartnerRoleClassificationCode>
                </fromRole>
                <fromService>
                    <GlobalBusinessServiceCode>
                        Invoice Reject Provider Service
                    </GlobalBusinessServiceCode>
                </fromService>
                <Manifest>
                    <numberOfAttachments>
                        <CountableAmount>
                            0
                        </CountableAmount>
                    </numberOfAttachments>
                    <ServiceContentControl>
                        <ActionIdentity>
                            <GlobalBusinessActionCode>
                                Invoice Reject Notification Action
                            </GlobalBusinessActionCode>
                        </ActionIdentity>
                    </ServiceContentControl>
                </Manifest>
                <toRole>
                    <GlobalPartnerRoleClassificationCode>
                        Invoice Reject Receiver
                    </GlobalPartnerRoleClassificationCode>
                </toRole>
                <toService>
                    <GlobalBusinessServiceCode>
                        Invoice Reject Receiver Service
                    </GlobalBusinessServiceCode>
                </toService>
            </MessageControl>
        </ActivityControl>
        <GlobalUsageCode>
            Test
        </GlobalUsageCode>
        <pipCode>
            <GlobalProcessIndicatorCode>
                3C4
            </GlobalProcessIndicatorCode>
        </pipCode>
        <pipInstanceId>
            <InstanceIdentifier>
                922730_20180912T050744
            </InstanceIdentifier>
        </pipInstanceId>
        <pipVersion>
            <VersionIdentifier>
                V01.00
            </VersionIdentifier>
        </pipVersion>
        <KnownInitiatingPartner>
            <PartnerIdentification>
                <GlobalBusinessIdentifier>
                    XXXXXX
                </GlobalBusinessIdentifier>
            </PartnerIdentification>
        </KnownInitiatingPartner>
    </ProcessControl>
</ServiceHeader>
  • And the Service Content
    • Service Content is specified in individual PIPs. Each PIP has one or more business actions that are described by means of individual DTDs or schema.
    • The payload part of a RosettaNet Business Message—that is, the actual business content—is a message in XML format.

BizTalk RosettaNet (BTARN): PIP name specified does not match the PIP specification - Message Parts

For this problem, the things you need to know about the PublicResponderProcess orchestration is that:

  • It will call a method “GetRuntimeConfig” on the “GetRNConfig” shape that will get the process/agreement configuration;
rnConfig = Microsoft.Solutions.BTARN.ConfigurationManager.RuntimeConfigGenerator.GetRuntimeConfig
  (destinationPartyID, sourcePartyID, pipCode, pipVersion,
    false, true
 );
  • And it will call a method “IsActionMessageValid” on the “ValidateMessage” shape that will validate if the message received a match to any process/agreement active in the system
rnConfig.IsActionMessageValid( inRNIFMessage, out exceptionInfo );
    • This last method calls an additional method call “ValidateActionServiceHeader”, here a piece of the code:
...
if (propertyValue != base.GetPIPConfigValue("PIP_Name"))
{
   str = str + StringResources.GetString(StringResourceIDNames.rtcV11InvalidPipName);
}
...
      • “GetPIPConfigValue(“PIP_Name”)” comes from the RosettaNet process

03-BizTalk-RosettaNet-BTARN-PIP-Process

      • The other comes from the Service Header message part in the BusinessActivityIdentifier element
      • Both need to be equal – case sensitive!

My problem was that:

  • the RosettaNet process name was: Notify of Invoice Reject
  • and the Service Header was: Notify Of Invoice Reject

Solution

To solve this issue you must.

  • Ensure that the process name is equal to the BusinessActivityIdentifier element in the Service Header message part
Author: Sandro Pereira

Sandro Pereira lives in Portugal and works as a consultant at DevScope. In the past years, he has been working on implementing Integration scenarios both on-premises and cloud for various clients, each with different scenarios from a technical point of view, size, and criticality, using Microsoft Azure, Microsoft BizTalk Server and different technologies like AS2, EDI, RosettaNet, SAP, TIBCO etc. He is a regular blogger, international speaker, and technical reviewer of several BizTalk books all focused on Integration. He is also the author of the book “BizTalk Mapping Patterns & Best Practices”. He has been awarded MVP since 2011 for his contributions to the integration community.

The post Receiving a RNIF exception: PIP name specified does not match the PIP specification (error number 2005). appeared first on BizTalkGurus.

BizTalk Pipeline Components Extensions Utility Pack: Multi-Part Message Attachments Zipper Pipeline Component

$
0
0

A few days ago, I publish the first version of the community project BizTalk Pipeline Components Extensions Utility Pack for BizTalk Server 2016. Today I please to announce that a new pipeline component was added to this project: Multi-Part Message Attachments Zipper Pipeline Component.

This was an old component that I had published in the past for BizTalk Server 2006/2006 R2/2009 and 2010 that I now updated and improved to BizTalk Server 2016 with the help with my internal team at DevScope, in special, Pedro Almeida.

What is BizTalk Pipeline Components Extensions Utility Pack?

BizTalk Pipeline Components Extensions Utility Pack is a set of custom pipeline components (libraries) with several custom pipeline components that can be used in received and sent pipelines, which will provide an extension of BizTalk out-of-the-box pipeline capabilities.

BizTalk Pipeline Components Extensions Utility Pack: Multi-Part Message Attachments Zipper Pipeline Component

Multi-Part Message Attachments Zipper Pipeline Component

The BizTalk Multi-Part Message Attachments Zipper is a pipeline component for BizTalk Server which can be used in a send pipeline and is intended to replace all attachments of a multi-part message for its zipped equivalent.

The capabilities are similar to those available in compression software such as WinZip or 7-zip:

  • Attachments Compression – Extracts, in a send pipeline, all message parts include in a multi-part message that is not included in the message body (Message Body Part = False), compresses it and attaches the compressed attachment back to the message.
  • This component requires one configuration that is the FileExtension where you can specify if you want for example a .zip or .gz file.

No compression/decompression software needs to be installed in the BizTalk Server machines.

To use this pipeline component in your projects you just copy the “PipelineComponentMultipartMsgZipAttach.dll” file into “Pipeline Components“ folder that exists in BizTalk Server Installation directory: “..Program Files (x86)Microsoft BizTalk Server <version>Pipeline Components” on every server.

You do not need to add a custom pipeline component to be used by the BizTalk Runtime to the Global Assembly Cache (GAC).

The project is available on BizTalk Server Open Source Community repository on GitHub (https://github.com/BizTalkCommunity) and everyone can contribute with new pipeline components that can extend or improve the existing BizTalk Server capabilities.

At the moment it is only available for BizTalk Server 2016 but it will soon be compiled and available for previous versions of the product.

Where to download?

You can download BizTalk Pipeline Components Extensions Utility Pack from GitHub here:
BizTalk Pipeline Components Extensions Utility Pack
GitHub

Author: Sandro Pereira

Sandro Pereira lives in Portugal and works as a consultant at DevScope. In the past years, he has been working on implementing Integration scenarios both on-premises and cloud for various clients, each with different scenarios from a technical point of view, size, and criticality, using Microsoft Azure, Microsoft BizTalk Server and different technologies like AS2, EDI, RosettaNet, SAP, TIBCO etc. He is a regular blogger, international speaker, and technical reviewer of several BizTalk books all focused on Integration. He is also the author of the book “BizTalk Mapping Patterns & Best Practices”. He has been awarded MVP since 2011 for his contributions to the integration community.

The post BizTalk Pipeline Components Extensions Utility Pack: Multi-Part Message Attachments Zipper Pipeline Component appeared first on BizTalkGurus.

Microsoft Integration Weekly Update: October 1, 2018

$
0
0

Do you feel difficult to keep up to date on all the frequent updates and announcements in the Microsoft Integration platform?

Integration weekly update can be your solution. It’s a weekly update on the topics related to Integration – enterprise integration, robust & scalable messaging capabilities and Citizen Integration capabilities empowered by Microsoft platform to deliver value to the business.

If you want to receive these updates weekly, then don’t forget to Subscribe!

Feedback

Hope this would be helpful. Please feel free to reach out to me with your feedback and questions.

Advertisements

The post Microsoft Integration Weekly Update: October 1, 2018 appeared first on BizTalkGurus.

BizTalk Pipeline Components Extensions Utility Pack: Carry SOAPHeader To WCF-BasicHttp Pipeline Component

$
0
0

BizTalk Pipeline Components Extensions Utility Pack community project for BizTalk Server 2016 got a new update and now it has another new component that you can use in your custom BizTalk Server pipelines: Carry SOAPHeader To WCF-BasicHttp Pipeline Component.

Carry SOAPHeader To WCF-BasicHttp Pipeline Component

The Carry SOAPHeader To WCF-BasicHttp is a pipeline component for BizTalk Server which can be used in a send pipeline and is intended to carry forward the received custom SOAP Header to the outgoing message, in other words:

  • This component will read the Custom SOAPHeader from the Message Context Properties
    • The custom header name will be defined on the component configuration and we can read it from the target “http://schemas.microsoft.com/BizTalk/2003/SOAPHeader”
  • and will configure this custom header in the OutboundCustomHeaders property used by the WCF-BasicHTTP Adapter.

The OutboundCustomHeaders property is used if you want to specify the custom SOAP headers for outgoing messages. When this property is used, the property must have the <headers> element as the root element. All of the custom SOAP headers must be placed inside the <headers> element

  • If the custom SOAP header value is an empty string, you must assign <headers></headers> or <headers/> to this property

This component is useful if you are implementing CBR operations on legacy service (SOAP – .asmx) using the new WCF-Adapters in BizTalk Server. Notice that the SOAP adapters, still present in BizTalk Server 2016, are obsolete and discontinued.

To use this pipeline component in your projects you just copy the “CarrySOAPHeader.dll” file into “Pipeline Components“ folder that exists in BizTalk Server Installation directory: “..Program Files (x86)Microsoft BizTalk Server <version>Pipeline Components” on every server.

You do not need to add a custom pipeline component to be used by the BizTalk Runtime to the Global Assembly Cache (GAC).

What is BizTalk Pipeline Components Extensions Utility Pack?

BizTalk Pipeline Components Extensions Utility Pack is a set of custom pipeline components (libraries) with several custom pipeline components that can be used in received and sent pipelines, which will provide an extension of BizTalk out-of-the-box pipeline capabilities.

BizTalk Pipeline Components Extensions Utility Pack: Multi-Part Message Attachments Zipper Pipeline Component

The project is available on BizTalk Server Open Source Community repository on GitHub (https://github.com/BizTalkCommunity) and everyone can contribute with new pipeline components that can be extended or improve the existing BizTalk Server capabilities.

At the moment it is only available for BizTalk Server 2016 but it will soon be compiled and available for previous versions of the product.

Where to download it?

You can download BizTalk Pipeline Components Extensions Utility Pack from GitHub here:
BizTalk Pipeline Components Extensions Utility Pack
GitHub

Author: Sandro Pereira

Sandro Pereira lives in Portugal and works as a consultant at DevScope. In the past years, he has been working on implementing Integration scenarios both on-premises and cloud for various clients, each with different scenarios from a technical point of view, size, and criticality, using Microsoft Azure, Microsoft BizTalk Server and different technologies like AS2, EDI, RosettaNet, SAP, TIBCO etc. He is a regular blogger, international speaker, and technical reviewer of several BizTalk books all focused on Integration. He is also the author of the book “BizTalk Mapping Patterns & Best Practices”. He has been awarded MVP since 2011 for his contributions to the integration community.

The post BizTalk Pipeline Components Extensions Utility Pack: Carry SOAPHeader To WCF-BasicHttp Pipeline Component appeared first on BizTalkGurus.

BizTalk Pipeline Components Extensions Utility Pack: Zip Pipeline Component

$
0
0

And once again, BizTalk Pipeline Components Extensions Utility Pack community project for BizTalk Server 2016 got a new update. A new component that you can use in your custom BizTalk Server Send pipelines is now available: Zip Pipeline Component.

Zip Pipeline Component

The Zip Pipeline Component is a pipeline component for BizTalk Server which can be used in a send pipeline (encode stage) and is intended to compress (zip/gzip) outgoing messages.

  • The capabilities are similar to those available in compression software such as WinZip or 7-zip:
  • This component requires two configurations that are:
    • the “FileExtension” where you can specify if you want for example a .zip or .gz file.
    • and “Enabled” that is a true or false value to activate the compression.

No compression/decompression software needs to be installed in the BizTalk Server machines.

This was an old component that I had that I now updated and improved to BizTalk Server 2016 with the help with my internal team at DevScope, in special, Pedro Almeida.

To use this pipeline component in your projects you just copy the “BizTalk.PipelineComponents.ZipFile.dll” file into “Pipeline Components“ folder that exists in BizTalk Server Installation directory: “..Program Files (x86)Microsoft BizTalk Server <version>Pipeline Components” on every server.

You do not need to add a custom pipeline component to be used by the BizTalk Runtime to the Global Assembly Cache (GAC).

What is BizTalk Pipeline Components Extensions Utility Pack?

BizTalk Pipeline Components Extensions Utility Pack is a set of custom pipeline components (libraries) with several custom pipeline components that can be used in received and sent pipelines, which will provide an extension of BizTalk out-of-the-box pipeline capabilities.

BizTalk Pipeline Components Extensions Utility Pack: Zip Pipeline Component

The project is available on BizTalk Server Open Source Community repository on GitHub (https://github.com/BizTalkCommunity) and everyone can contribute with new pipeline components that can be extended or improve the existing BizTalk Server capabilities.

At the moment it is only available for BizTalk Server 2016 but it will soon be compiled and available for previous versions of the product.

Where to download it?

You can download BizTalk Pipeline Components Extensions Utility Pack from GitHub here:
BizTalk Pipeline Components Extensions Utility Pack
GitHub

Author: Sandro Pereira

Sandro Pereira lives in Portugal and works as a consultant at DevScope. In the past years, he has been working on implementing Integration scenarios both on-premises and cloud for various clients, each with different scenarios from a technical point of view, size, and criticality, using Microsoft Azure, Microsoft BizTalk Server and different technologies like AS2, EDI, RosettaNet, SAP, TIBCO etc. He is a regular blogger, international speaker, and technical reviewer of several BizTalk books all focused on Integration. He is also the author of the book “BizTalk Mapping Patterns & Best Practices”. He has been awarded MVP since 2011 for his contributions to the integration community.

The post BizTalk Pipeline Components Extensions Utility Pack: Zip Pipeline Component appeared first on BizTalkGurus.

Viewing all 2977 articles
Browse latest View live